
Load balancers 101
The fundamentals of load balancers

Introduction
What is a load balancer?
When I first learned about the topic I thought a load balancer is an "exact thing." For example, an nginx config that balances load between servers. But as I learned more about this topic I realized that load balancer is a concept.
It's not an exact thing/technology. It can be applied on multiple levels:
Your operating system's CPU scheduler is a load balancer. You probably have 8 or 16 cores but if you run
htopyou should see 100s of tasks. The most important task of the scheduler is to balance the load across the cores. It works on the hardware level.PHP FPM is a load balancer. It has one master process and many worker processes. The master process accepts requests and forwards them to the worker processes. So it's a load balancer that works on the process level.
nginx is a load balancer. I mean, the internal workings of nginx. It has a master process and many worker processes. It works the same way as FPM but it handles all kinds of HTTP requests. It balances requests across worker processes. It also works on the process level.
docker-compose is a load balancer. Yes, you can have multiple replicas of the same container with docker-compose. For example, you can have multiple replicas of your API container listening on the same port and then balance the load with a simple nginx load balancer. It also works on the process level. Or I should say "container-level."
Your Laravel queue is a load balancer. Let's say you have 5 workers and 100 jobs. The jobs are distributed across the workers in order.
nginx is a load balancer. I mean, the user-facing part of nginx. You can implement a load balancer that distributes the traffic across multiple servers. You can run your load balancer on a dedicated server. It works on the server level.
Cloud providers offer managed load balancers. They are dedicated servers and usually run nginx or Traefik (which is a fancy nginx). It works on the server level.
And of course, Docker Swarm and Kubernetes have their own load balancer implementations (ingress). They work on the server/process level.
Your own algorithm can be a load balancer as well. For example, if you're working on an inventory management system. If a customer orders a product you need to choose a warehouse. You might implement a FIFO or LIFO algorithm. Or you select the warehouse that is closest to the customer. And of course, you need to check the quantities. Either way, you're balancing the "load" (orders) across warehouses. It works on the "business logic level."
So load balancing is not an exact thing or technology but a concept that can be applied in various situations. In this chapter, we're going to explore three different load balancers:
Plain nginx balancing the load across VPSs
docker-compose balancing the load across containers
Managed load balancers balancing the load between VPSs
nginx as a load balancer
This is the bare minimum nginx configuration for a load balancer:
user www-data;

events {}

http {
  upstream backend {
    server backend1.example.com;
    server backend2.example.com;
    server backend3.example.com;
  }

  server {
    listen 80;

    location / {
      proxy_pass http://backend;
    }
  }
}
The proxy_pass directive just forwards a request to a given location. It accepts every request that comes in to / and forwards them to the backend, which is an upstream. It is used to define a group of servers that will handle incoming requests.
In this example, the backend upstream defines a group of three servers: backend1.example.com, backend2.example.com, and backend3.example.com. Whenever you refer to http://backend you refer to the upstream which represents the three backend servers. nginx will balance the load across the three servers using the round-robin algorithm. Each backend server gets an equal amount of requests in circular order.

As you can see, it goes through the servers in a "circular order:"
R1 gets handled by Backend1
R2 gets handled by Backend2
R3 gets handled by Backend3
And then it starts over
R4 gets handled by Backend1
R5 gets handled by Backend2
R6 gets handled by Backend3
In order to test it I created three DigitalOcean servers:
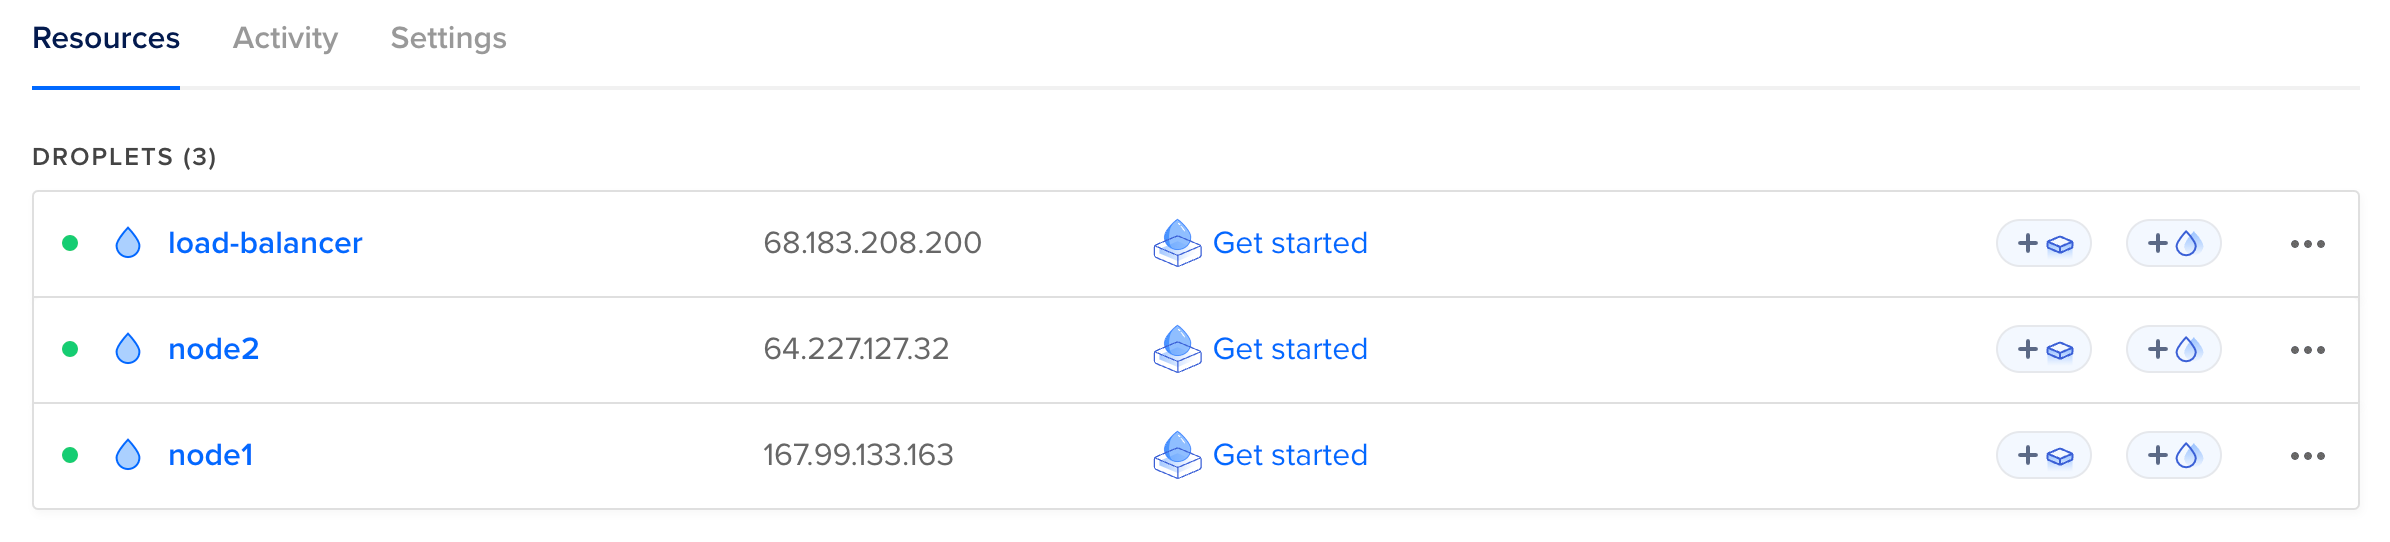
One load balancer and two actual servers. I didn't buy a domain for this, so I'm using IP addresses:
upstream backend {
  server 167.99.133.163;
  server 64.227.127.32;
}
On the servers, I'll run a very simple PHP script:
<?php

echo json_encode([
  'data' => [
    'hostname' => gethostname(),
  ],
]);
It returns the hostname of the server such as node1 or node2.
To serve this PHP script we need a minimal nginx config on the servers:
server {
  listen 80;
  index index.php;

  location / {
    root /var/www/html;
    include /etc/nginx/fastcgi.conf;
    fastcgi_pass unix:/run/php/php8.0-fpm.sock;
    fastcgi_index index.php;
    fastcgi_param PATH_INFO $fastcgi_path_info;
  }
}
Every request is served by index.php which always returns the hostname.
If I now hit node1 it always returns node1 and node2 responds with node2:
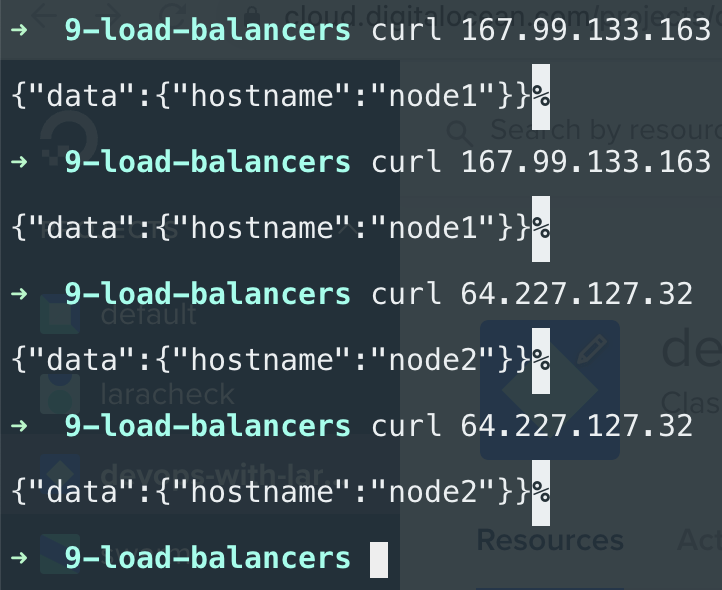
But if I hit the load balancer's IP address you can see it starts to distribute the traffic between the two nodes:

This is round-robin in action. Of course, it doesn't matter if you have only a single PHP file or a whole Laravel application. Load balancing is the same. You have a dedicated server with an nginx config that distributes the incoming traffic across your nodes.
Managed load balancers
Every cloud provider offers managed load balancers. The main benefits are:
You don't have to maintain your load balancer configuration. By maintaining, I mean, adding new servers to the upstream, changing domain names, etc. And of course having the actual server, upgrading it, restarting nginx when the configuration changes, etc.
Better/easier monitoring. Managed load balancers offer load balancer-specific metrics/graphs by default.
Built-in health checks.
Cheap. On DigitalOcean it costs $12/month to have a managed load balancer that handles 10000 concurrent connections. Of course, you can achieve the same with a $6 droplet and a custom nginx configuration, but $12 is still pretty cheap, and in this case, 10000 is guaranteed.
Scaling, high availability. You can have multiple replicas of your load balancer. So if you know that you need ~100000 concurrent requests you can just increase the number of nodes to 10. For $120/month you now can handle 100000 concurrent connections.
I'm going to use DigitalOcean again. You can find load balancers in the Networking nav item. This is what the scaling configuration looks like:

And this is the "upstream" configuration:

You can select particular droplets or tags as your upstream servers. In this example, I use the tag lb-example. As you can see, there are two droplets tagged as lb-example. Tags are great because you can just add or remove them to other servers and your load balancer will automatically apply these changes.
Forwarding rules are quite straightforward. In this case, the load balancer forwards incoming requests from port 80 to port 80 on the target droplets. Of course, you need to use port 443 if you set up a certificate (which I didn't do for this example).
And that's it! With just 3 minutes of setup, we have a load balancer that handles 20000 concurrent connections.
This is the dashboard:

It figured out the exact droplets based on the tag which is a pretty good feature. You don't have to manually update any nginx configuration when you add a new server. You just tag your server which is pretty easily scriptable.
And of course, we have graphs as well:
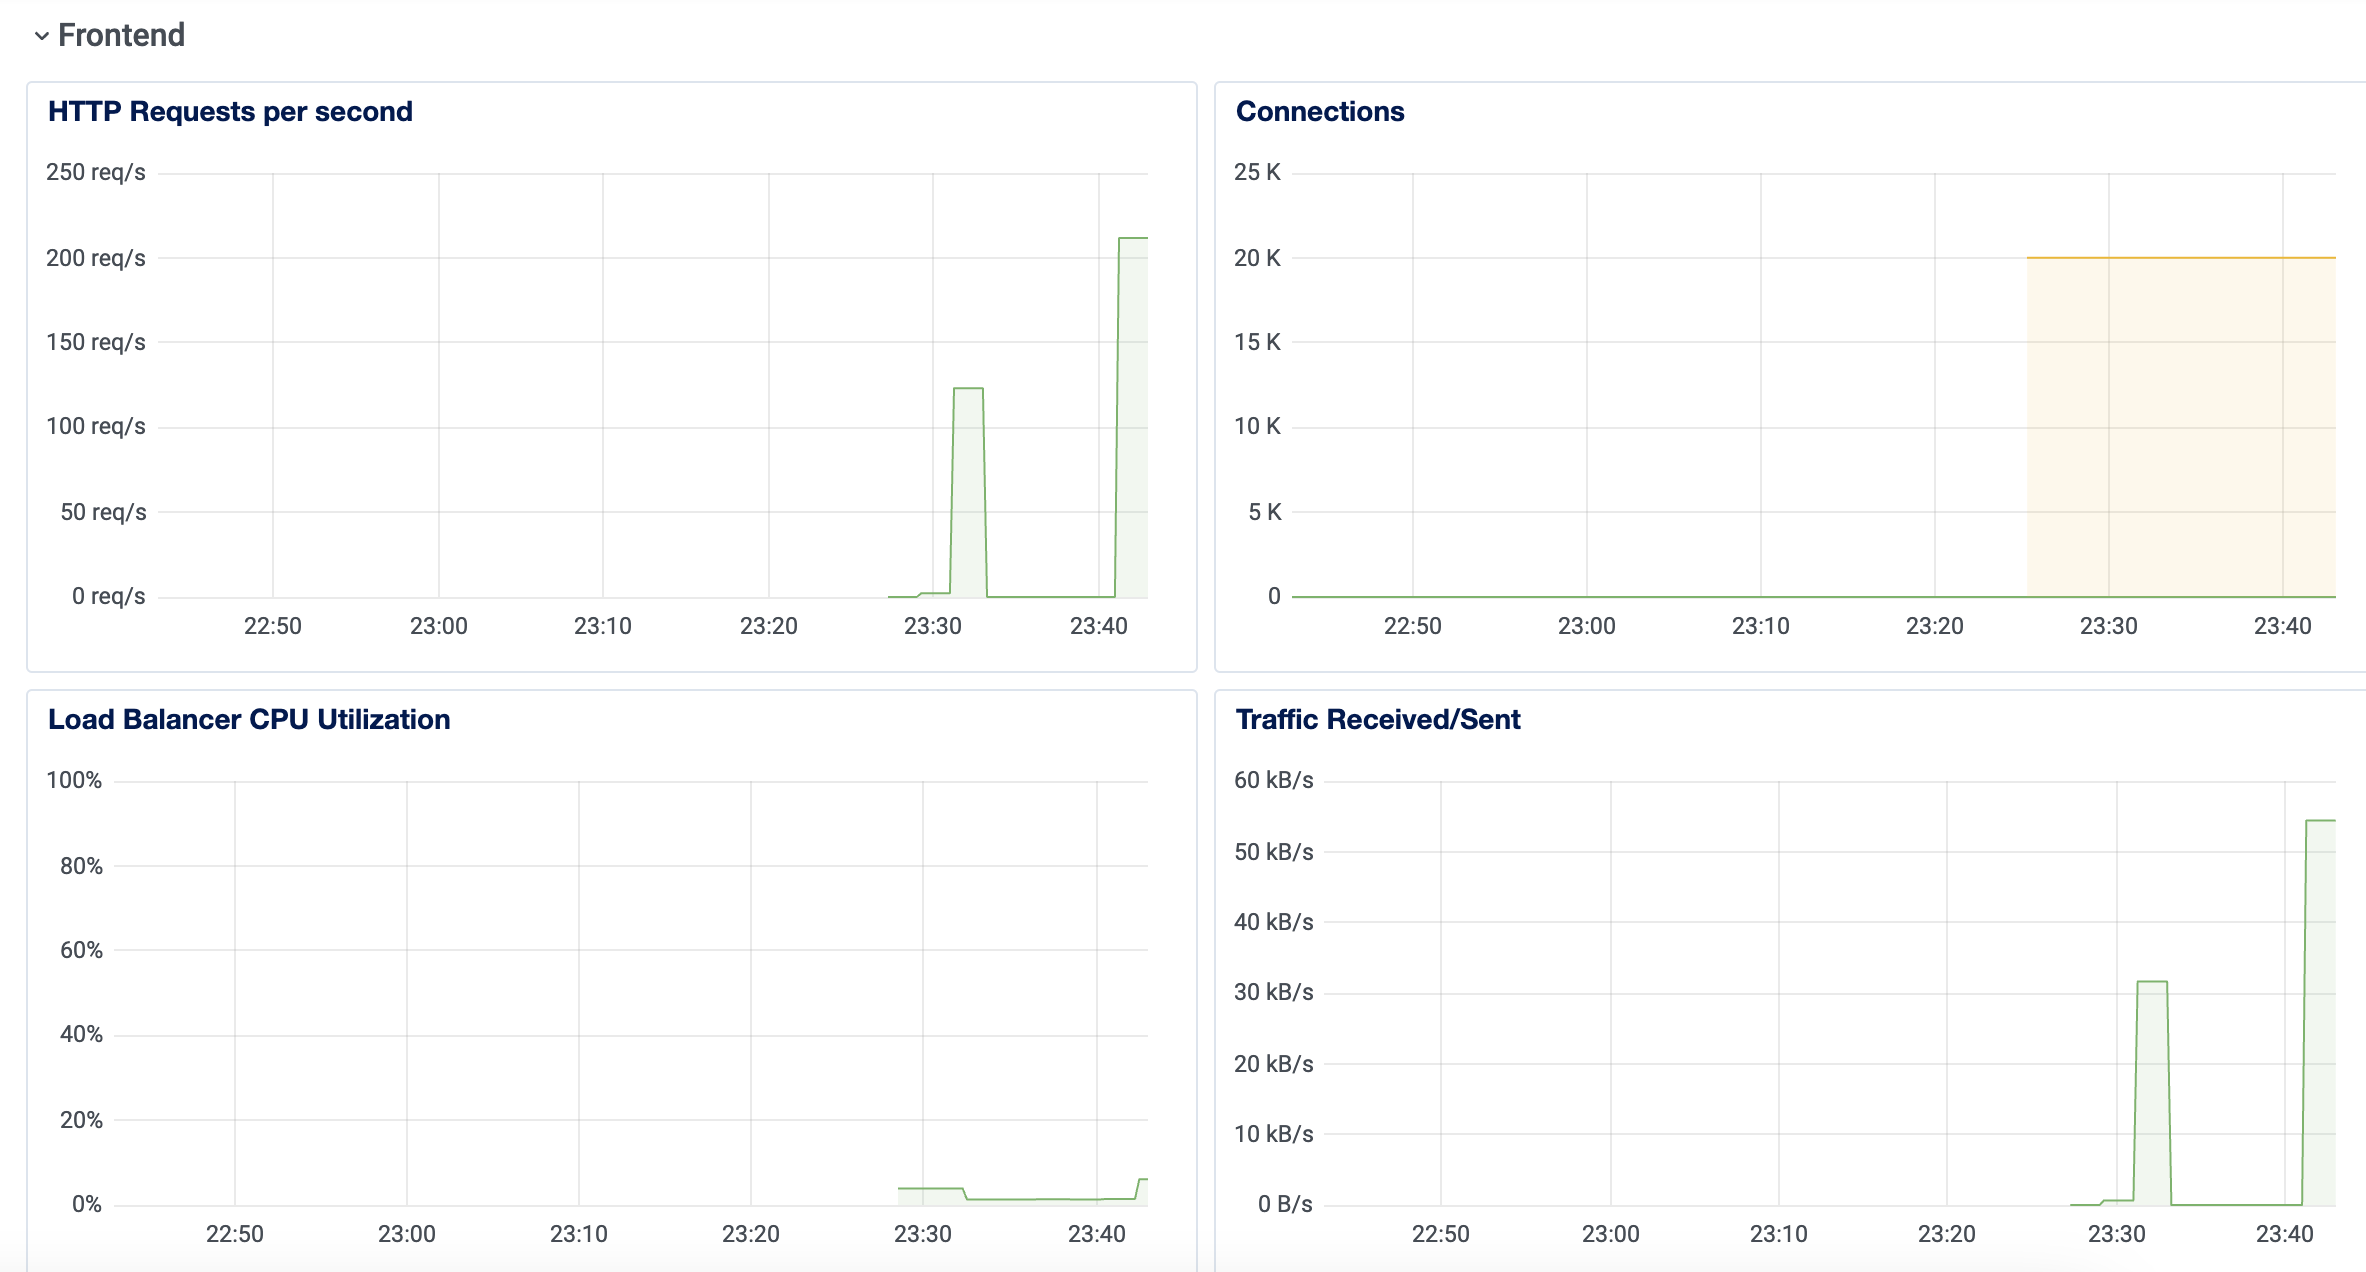
HTTP requests per second and connections are probably the most important ones.
Load balancing with docker-compose
docker-compose can also be used as a load balancer. If you check out the documentation there are some commands under the deploy key that can be used with docker-compose even when you're not in Swarm mode. replicas is one of them:
version: '3.8'
services:
  app:
    build:
      dockerfile: Dockerfile
      context: .
    deploy:
      replicas: 2
    ports:
      - "8000"
If you run docker-compose up this is what happens:

The app service runs two containers: lb-app-1 and lb-app-2. We specified two replicas so docker-compose started two containers. Just like Swarm or Kubernetes.
Both containers bind to a random port on the host machine. In my case, they are 64919 and 64965. When you define ports in a compose you have a number of options. The most popular is this: HOST:CONTAINER. This is exactly what we used earlier in the book. But you can omit the HOST port and specify only the container port with "8000". This means the container listens on port 8000 and docker-compose binds it to a random (high) port on the host machine. This is exactly what we need if we want to run a service in multiple replicas.
As you might expect, now we access the application on two different ports:

Now everything is ready to create a load balancer service that distributes the traffic between the two app containers. In this case, I'm going to use a simple nodejs server. I'm going to explain why at the end of the chapter, however, there's no real difference from the load balancer point of view.
But in this case, we don't need an upstream because we don't have multiple servers. It's just a simple proxy_pass to the app service:
http {
  server {
    listen 3000;

    location / {
      proxy_pass http://app:8000;
    }
  }
}
So nginx forwards the requests to app:8000. Since we wrote replicas: 2 in the compose file, docker-compose distributes the requests between the two replicas. We need another service for the load balancer as well:
load-balancer:
  image: nginx:1.25-alpine
  restart: unless-stopped
  volumes:
    - ./load-balancer.conf:/etc/nginx/nginx.conf:ro
  ports:
    - "3000:3000"
  depends_on:
    - app
This is what the whole process looks like:
docker-compose acts like an internal load balancer for the containers. From nginx point of view, it only sees a regular domain name with a port that refers to the compose service.
If you now try to hit the load balancer you can see the two containers serving the requests in a round-robin fashion:

This is the complete docker-compose file:
version: '3.8'
services:
  load-balancer:
    image: nginx:1.25-alpine
    restart: unless-stopped
    volumes:
      - ./load-balancer.conf:/etc/nginx/nginx.conf:ro
    ports:
      - "3000:3000"
    depends_on:
      - app

  app:
    build:
      dockerfile: Dockerfile
      context: .
    deploy:
      replicas: 2
    ports:
      - "8000"
    volumes:
      - ./index.js:/usr/src/app/index.js
That’s it for today. These are the basics every software engineer should know about load balancers, in my opinion. In a future post, I’ll build one.
If you have questions, don’t forget to
I came across your articles a few days ago and I find those very interesting and informative. A friendly feedback; can you please provide the full name of the acronyms when you first use them? Afterwards you can use the acronym in the following parts of the article. Therefore the reader does not need to open another browser in mobile to search what it is. It is really time consuming. For example not every reader can know VPS (including me-;))
You stated creating mutliple nodes of load balance on digital ocean.
How can this be managed in the client side, would they now have mutliple ips or base url to use?
What does this mean for a client trying to access the app/api.